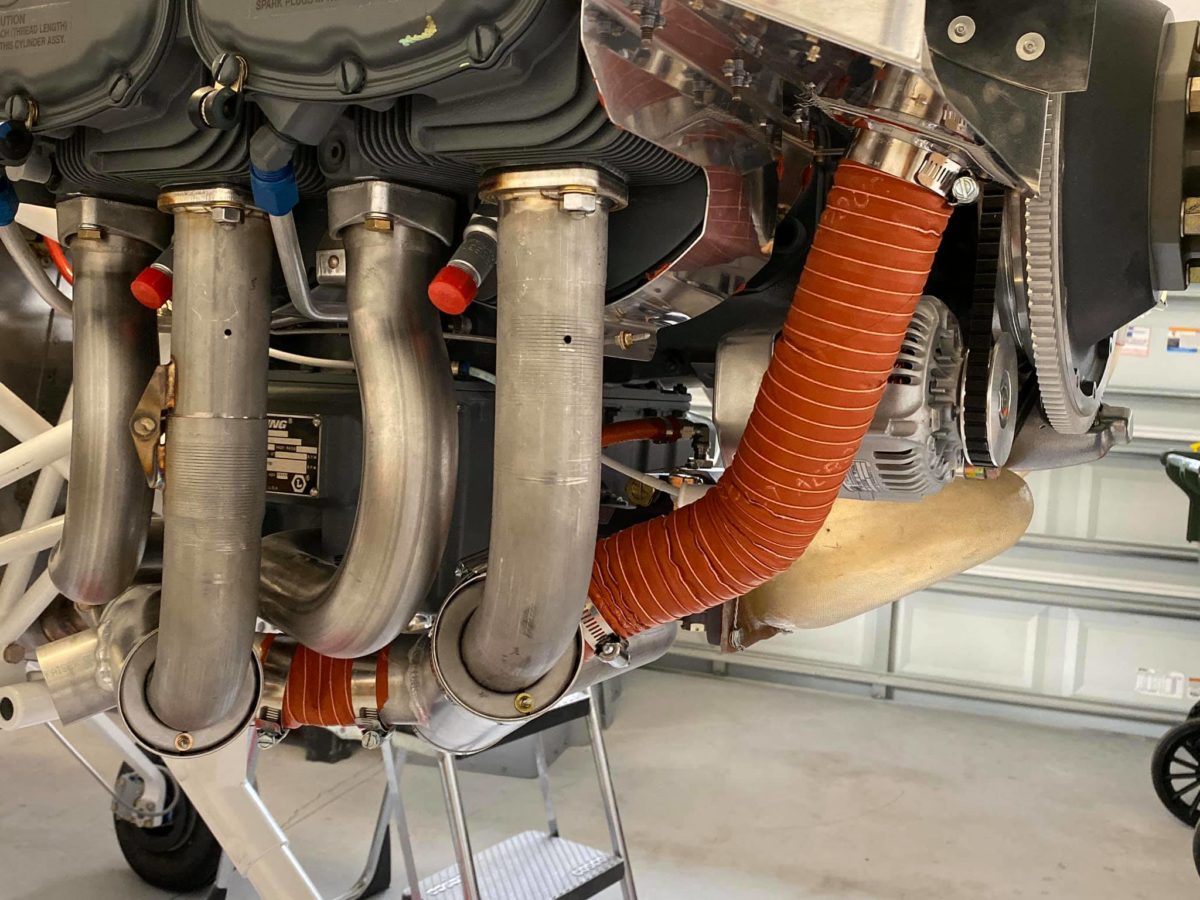
First two heater system SCAT hoses installed. Still need to run a bead of RTV down each one.
Duct tee installed. It looks so benign, so harmless, but it’s one of the toughest items to install that I’ve yet encountered, especially the inboard side with the spacer tube. Just…ugh…
Two of the heat shields installed. These will protect the fuel flow transducer and fuel hose from the exhaust pipes’ heat. Theoretically.
The third heat shield installed. This one will protect the throttle cable (not yet installed in this photo) from the exhaust pipe’s heat. Theoretically.
Prop governor cable bracket installed.
Oil breather hose and tube installed. This was another unexpectedly challenging installation. The two Adel clamps on the firewall – especially the lower one – are a screaming BEAR to get nipped up tight. Eventually, a little help from my wife and some ingenuity with available tools won the day. As usual.
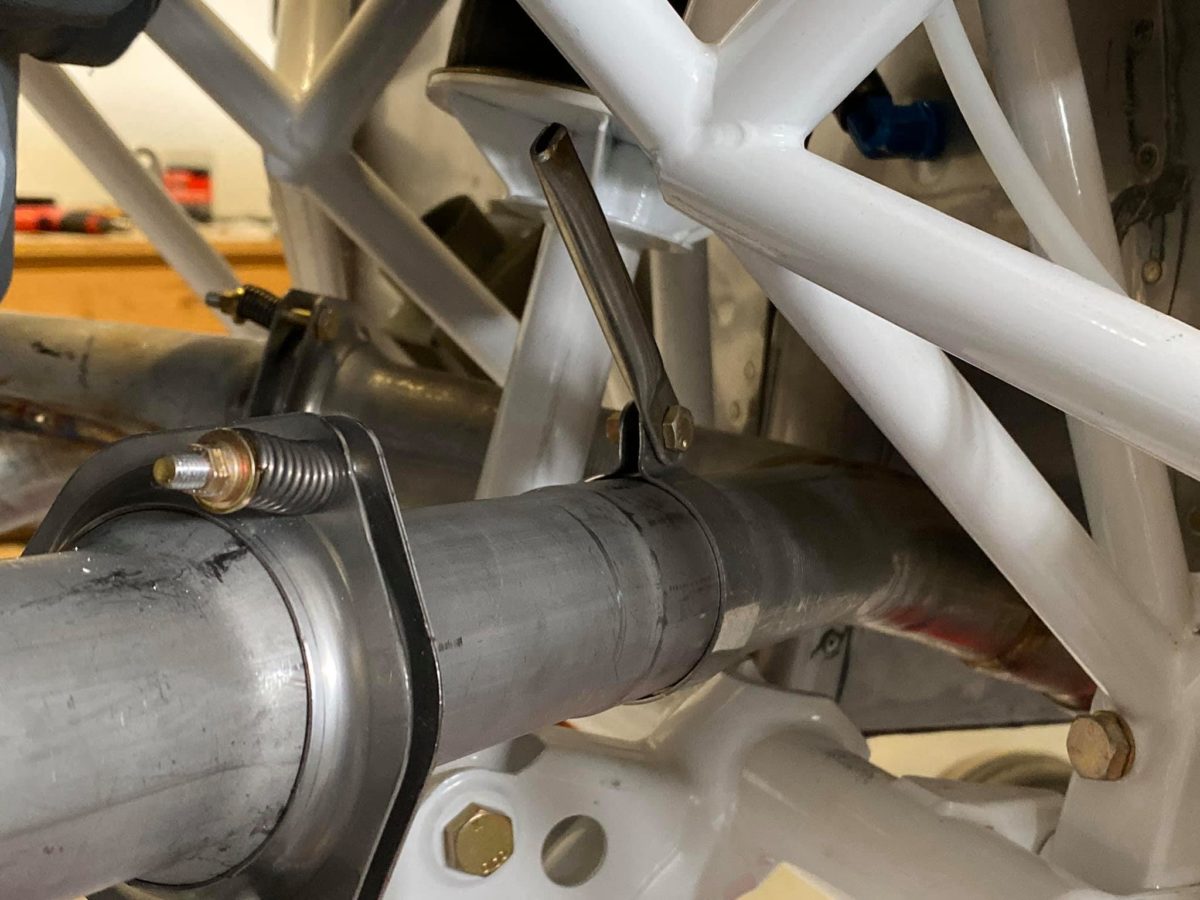
Exhaust hanger bracket and one of the exhaust hanger tubes.
Exhaust pipes all torqued down with lock washers inserted.
Exhaust pipes all torqued down with lock washers inserted.
Heat muff assembly innards awaiting their turn to play.
Heat muff assembly innards installed on the exhaust pipes. I really hate MS21042 nuts and the smaller they get, the worse they are to tighten. Wrenches and sockets don’t want to stay on them with any force applied and working in the ever-more-restricted confines of the FWF area makes it an order of magnitude more difficult.
I had a bad feeling (which turned out to be correct) that the bulkhead fuel fitting through the firewall (which will shortly be connected to the engine-driven fuel pump) would have to be removed to facilitate installation of the tailpipe in its correct orientation. Not fun, but all done now.
Also, ball-joint spring retainers installed and tightened.
Right-side exhaust pipes loosely in place.
Left-side exhaust pipes loosely in place.
Ball-joint spring retainers installed and tightened.
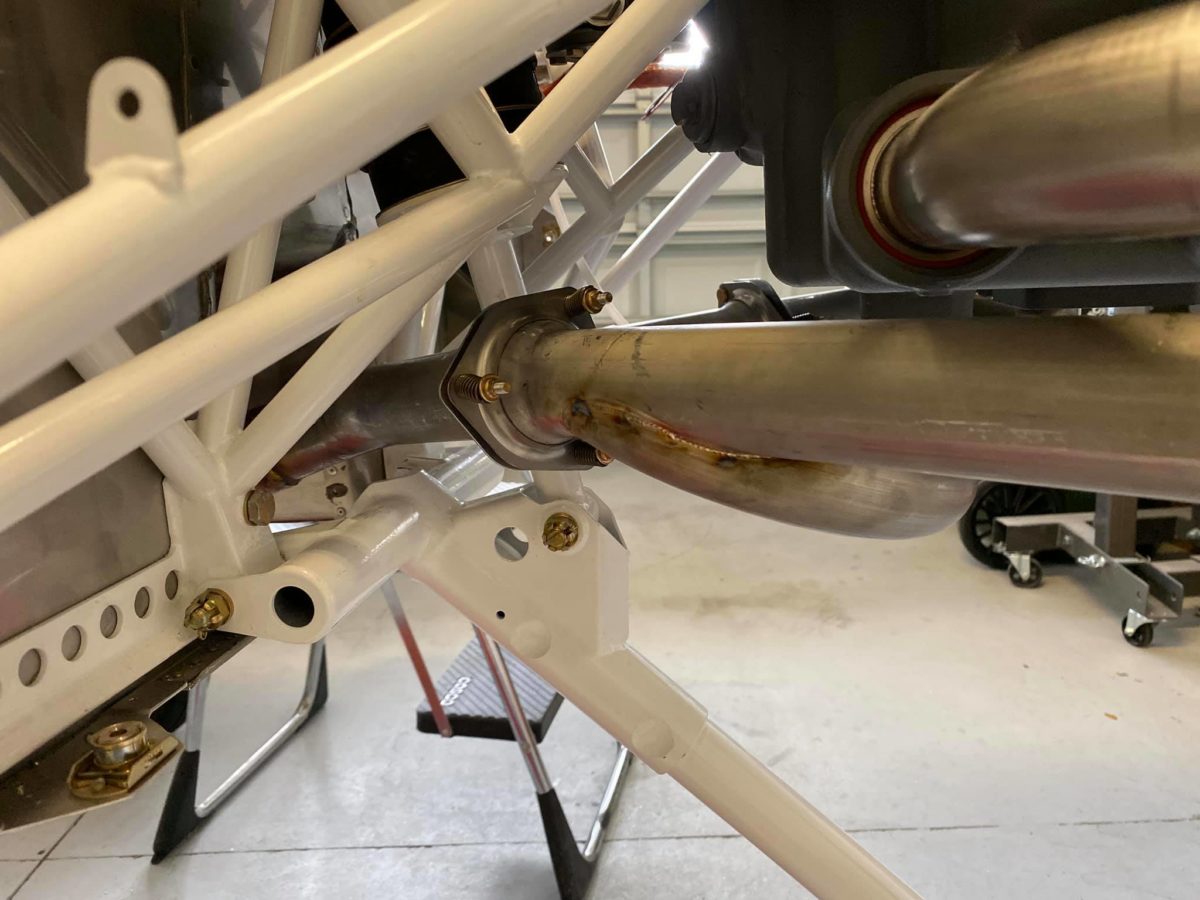
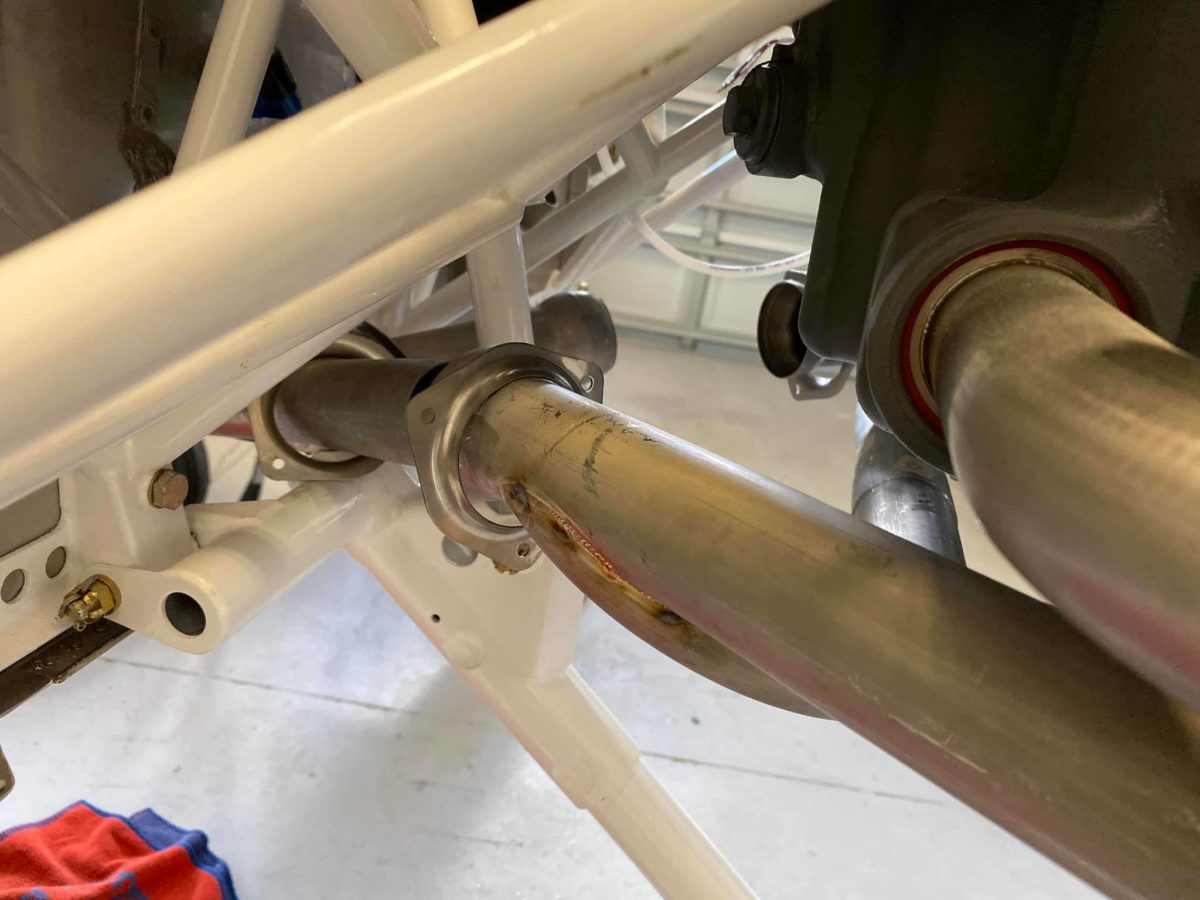
Note how the ‘Y’ coming from the tailpipe doesn’t match up to the forward and aft exhaust systems. I was convinced that something was backward, but couldn’t figure out where I’d screwed up – or if Van’s had welded the hanger tabs on the tailpipe 180-degrees out.
The answer occurred to me as I was reviewing these photos: all I need to do is turn the ‘Y’ 180-degrees in its ball joint. Unfortunately, I’ll need to remove the tailpipe in order to do that, but it could’ve been worse.
Consider this a word of warning to future -14A builders…