Firewall forward, finish, cowling components in process

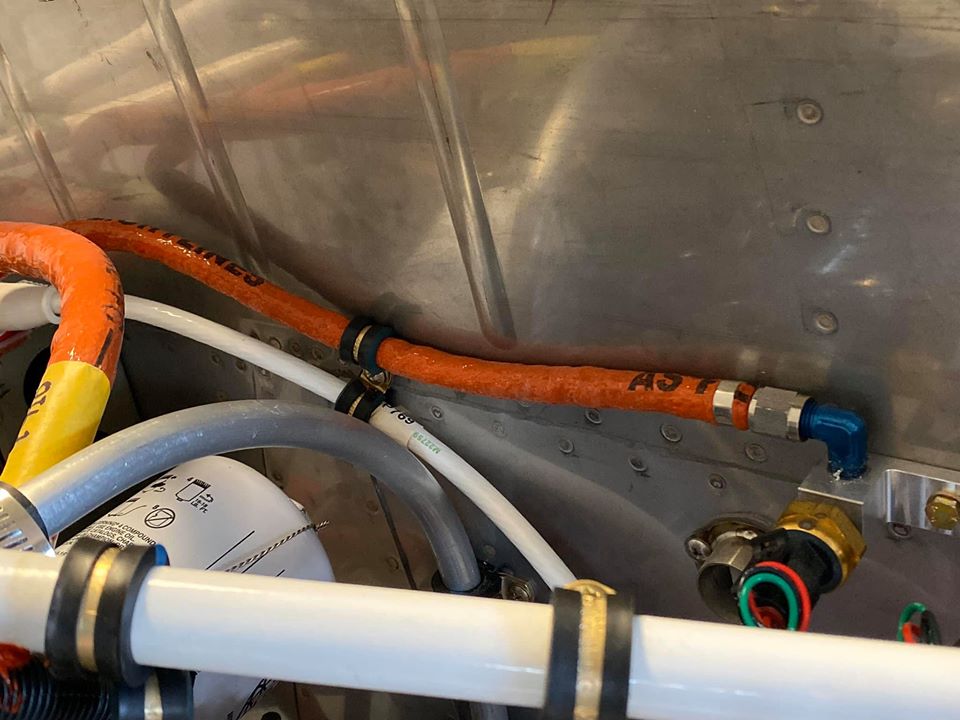
Swapped the upper Adel clamp (mounted on the firewall in the center of the photo) for a slightly larger one to accommodate the firesleeved oil pressure hose.

Cover removed from vacuum pump pad to make room for the B&C backup alternator. Holding it in place today made it clear to see that the lower left nut and washers will be nigh on impossible to get started, nevermind torqued. More fun stuff…

Left side EGT probes installed. Wiring to come once the panel and its many boxes have been mounted.

Right side EGT probes installed. Wiring to come once the panel and its many boxes have been mounted.

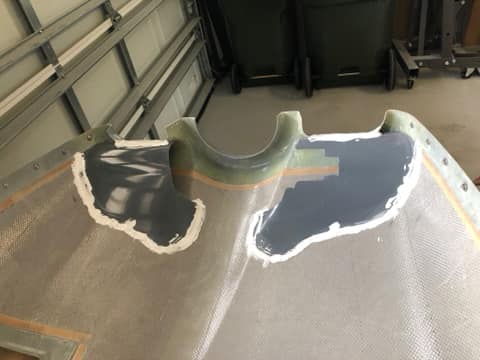
Back to fiberglass: upper cowl micro sanded and cleaned prior to epoxying.

Upper cowl micro epoxied.

Firewall forward, finish, cowling underway

I was happy with the behind-the-spinner nutplate installation until I realized that I put them on the top cowl when they belong on the bottom. Argh!! What an idiot!

I fixed them today and will flox those eight rivet holes sometime in the next few days.

I was happy with the behind-the-spinner nutplate installation until I realized that I put them on the top cowl when they belong on the bottom. Argh!! What an idiot!

I fixed them today and will flox those eight rivet holes sometime in the next few days.

Cowl inlet ramps with scribe lines highlighted for trimming.

Cowl inlet ramps with initial trim completed. The glass is fairly easy to cut with a combination of left & right tin snips.

Cowl inlet drilling to the upper cowl underway.

Cowl inlet drilling to the upper cowl complete. The four clecos securing each inlet to the cowling are drilled only through the honeycomb and NOT through the fiberglass, itself. Carefully, carefully…

Left cowl inlet with prop governor clearance hole cut out.

First test fitting of the cowl halves with the inlets in place. Everything went on like it should, so I was pleased if more than a little surprised.

Cowl inlets floxed in place.

Cowlings set in place overnight to permit inlet ramp flox to dry in its actual position.

Empennage, rudder, horizontal stabilizer, vertical stabilizer underway

Waiting for epoxy to set up after each operation caused some delays this week (plus, my compressor died and had to be replaced), so there are several days of progress represented in today’s update.

All three empennage tip fairings are shown here having received their initial internal flox fillets and fiberglass layups.

One of the spinner gap fillers shown here with its flox fixes in place. They came out pretty nice and should look fine once they’re primed and painted.

The other spinner gap filler shown here with its flox fixes in place. They came out pretty nice and should look fine once they’re primed and painted.

First post-sanding pass at fitting the left horizontal stabilizer tip fairing to clear the elevator counterweight arm.

First post-sanding pass at fitting the right horizontal stabilizer tip fairing to clear the elevator counterweight arm.

First post-sanding pass at fitting the vertical stabilizer tip fairing to clear the rudder counterweight arm.

Taillight installed and Molex connector fitted to the wiring harness.

Lots of micro slathered on in this (hopefully final) step. Some sanding tomorrow and another coat of filler primer should see these puppies ready for riveting. Hopefully.