Wingtip nutplate installation in process. Lots of holes to drill and countersink prior to riveting nutplates in place.
With all of the nutplates riveted, I installed the nav light mount seen here.
Unfortunately, I then discovered that the electrical connector half (of the awful, open-barrel “Molex” type) received with the wing kit last summer and installed back when I built the wing doesn’t match the connectors included with the very nice AeroLED nav lights. A typical Van’s situation.
Rather than wait for a matching connector half to arrive, I think I’ll trash the original Molex half and go with the matching bits from the nav light box. A project for tomorrow…
Garmin GMU-22 magnetometer installed to its mount. The mount was fabricated last summer when building the left wing and has finally been plucked off the shelf to fulfill its purpose.
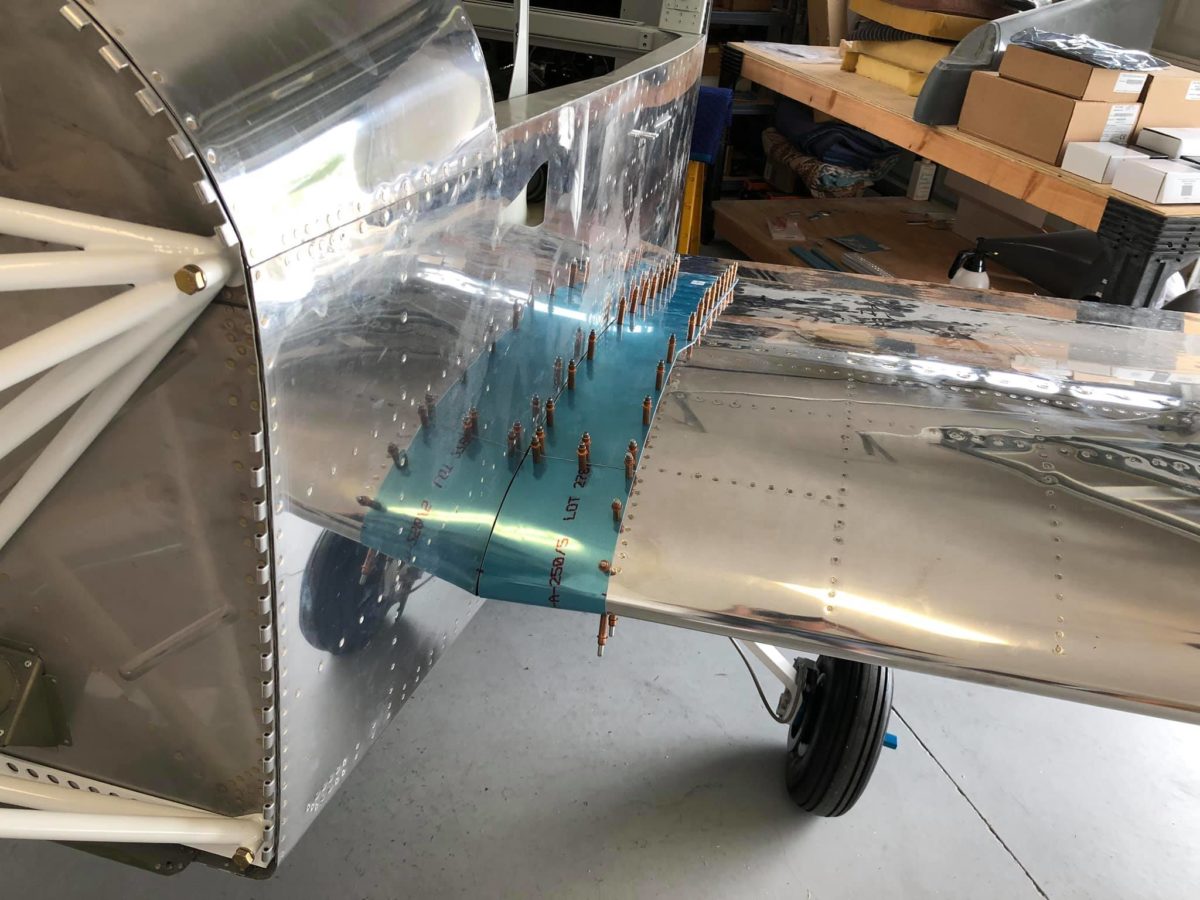
Left wing root fairings (upper & lower) clecoed in place for an initial fitting. A little tweaking required, but not bad at all. SO much better than the last time around (~18 years ago!).
Left wing root fairings (upper & lower) clecoed in place for an initial fitting. A little tweaking required, but not bad at all. SO much better than the last time around (~18 years ago!).
Left wing upper root fairing stiffeners being riveted in place.
Left wing root fairings (upper & lower) clecoed in place in their final form. They should be just about perfect when screwed down permanently following final wing attach (and wing root systems installations) at the airport this fall.
The forward three nutplates for the lower root fairing are all match-drilled to the fairing and then drilled for the nutplates. Van’s suggests a kludgy method of utilizing a nutplate as a drill template, but it’s far easier to simply use a nutplate drill jig.
Anyone who’s done this before already has those on hand in at least three sizes (for #6, #8, and #10 screws). Anyone doing it for the first time needs to go buy them right now and forget about the kludge.
Sure, it’s possible to do without the nutplate drill jigs, just as it’s possible to open a beer bottle with one’s teeth, but I wouldn’t recommend it.
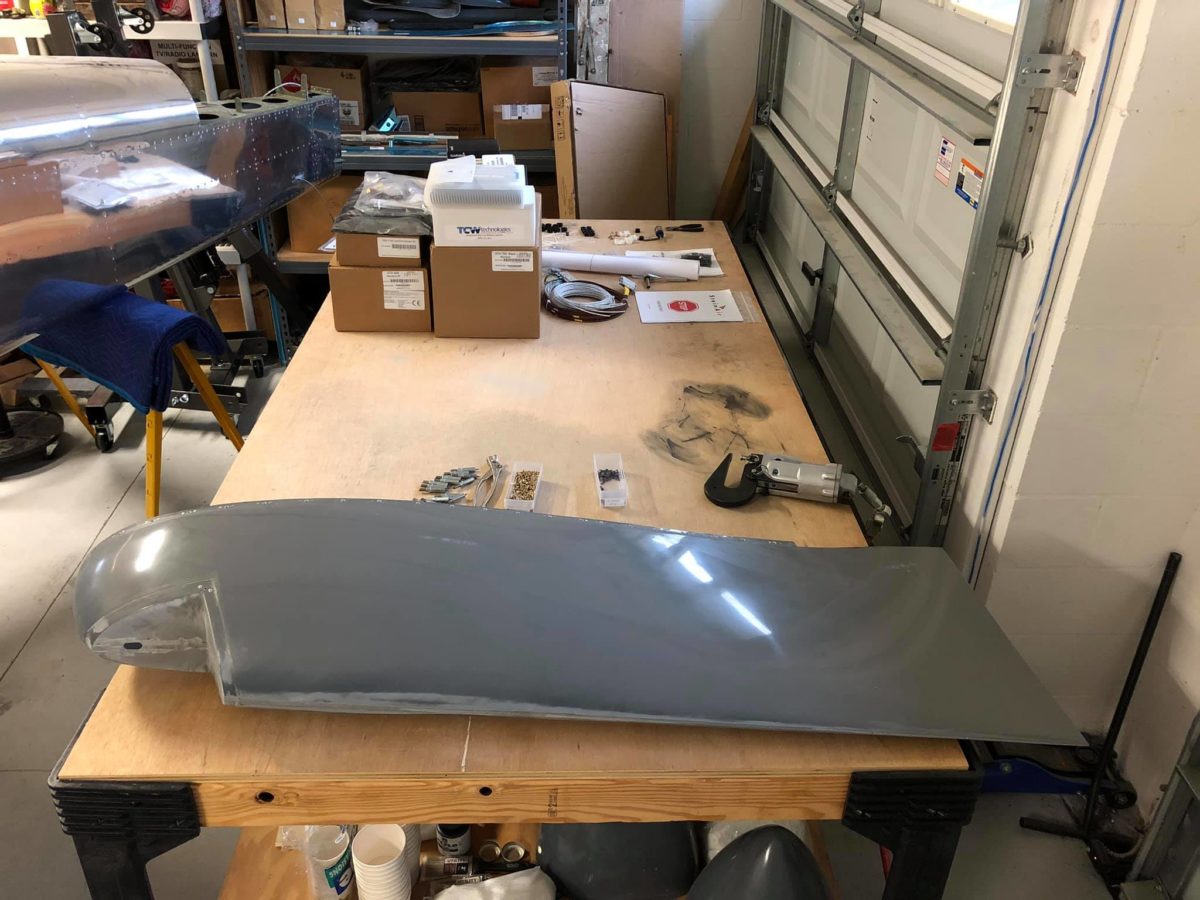
Left wingtip drilled and clecoed to the wing. I did this awhile ago while the wing was still vertical in the stand and will have to spend some time confirming the aileron rigging with the templates before moving forward with the wingtip.
I’ll be off the project for a couple of days, as tomorrow is my birthday. I’ll get back to it on Saturday and, if all goes well, will have the wingtip squared away (including nav light and lens) by early next week. Then, I get to do it all over again on the other side! Fun…
Nose gear elastomers installed to nose gear link. All hardware for gear mounting located and bushings fit to weldments as necessary.
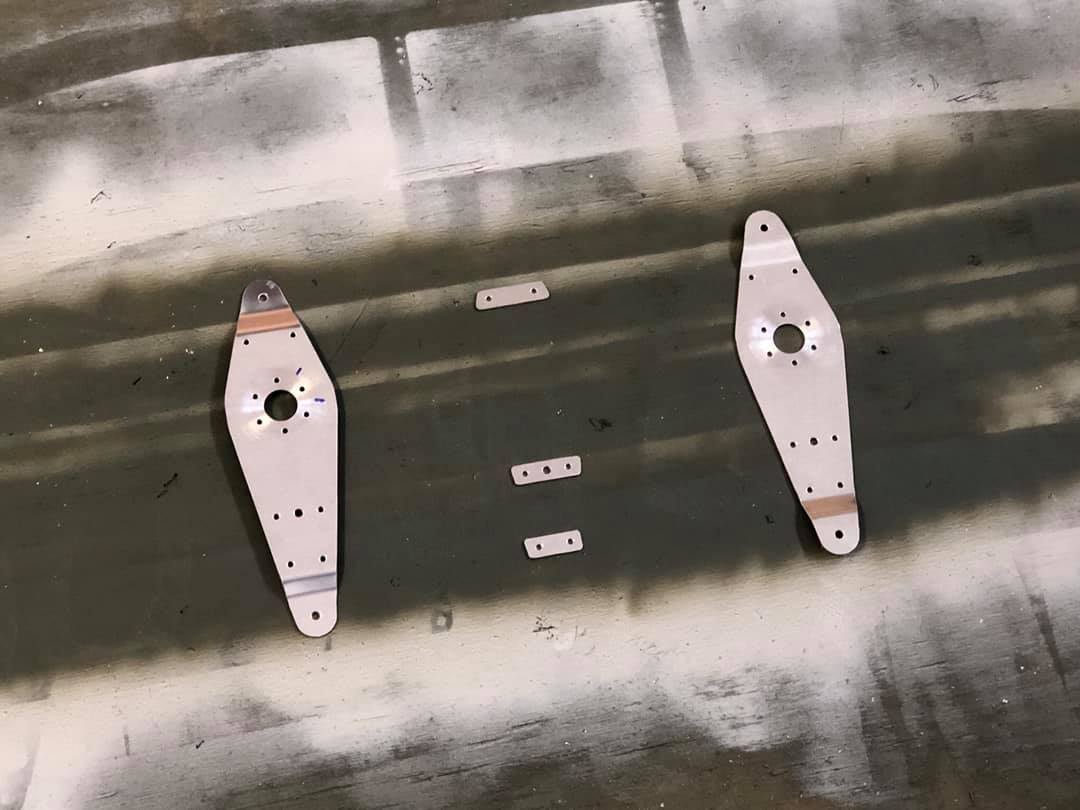
Interior miscellany deburred and dimpled as necessary. Nutplates and doubler riveted.
Interior miscellany deburred and dimpled as necessary. Nutplates and doubler riveted.
Some of the interior miscellany being painted. More to follow tomorrow.
I did all these parts as get-aheads, since I need to dispose of the crate prior to landing gear installation on Tuesday. Space in my garage is at an ever-increasing premium.