Final coat of pinhole-filling resin, partially sanded.

Final coat of pinhole-filling resin, sanded and masked for filler primer.

Final coat of pinhole-filling resin, sanded and masked for filler primer.

First coat of filler primer applied.

First coat of filler primer applied.

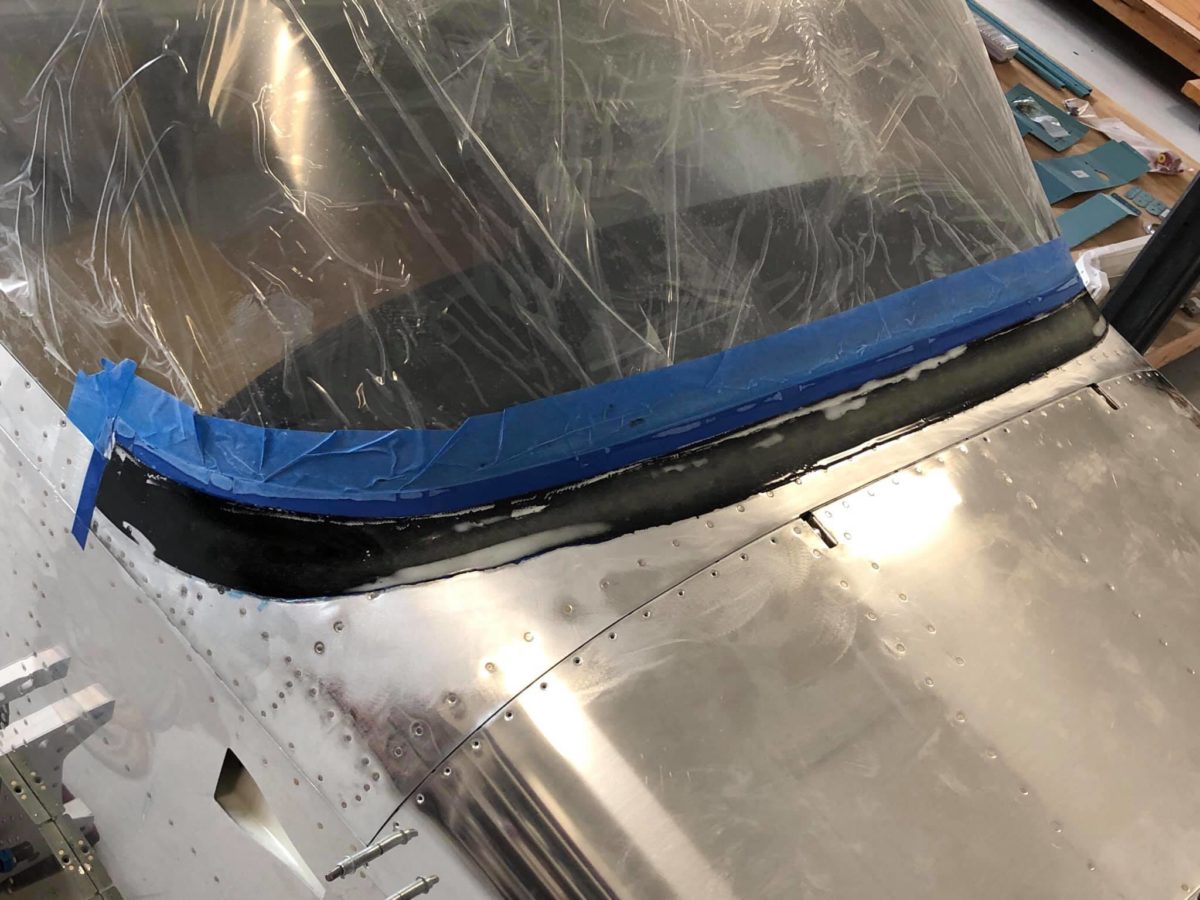
Aft edge masking paper and one layer of electrical removed. The fairing aft edge will be sanded to the width of a single layer of electrical tape.

Aft edge masking paper and one layer of electrical removed. The fairing aft edge will be sanded to the width of a single layer of electrical tape.

Aft edge now re-masked for additional filler primer.

Aft edge now re-masked for additional filler primer.

Several coats of filler primer later (sanding between each coat, of course), the final application is drying here.

Following the final sanding, all masking paper is removed.

The last layers of tape have been removed and the canopy fairing is done, at least so far as I’m concerned. This will be more than sufficient for Phase 1 testing.
The final work on the fairing will be down to Jonathan McCormick’s shop guys at Evoke Aviation.

The last layers of tape have been removed and the canopy fairing is done, at least so far as I’m concerned. This will be more than sufficient for Phase 1 testing.
The final work on the fairing will be down to Jonathan McCormick’s shop guys at Evoke Aviation.