Panel installation continued…

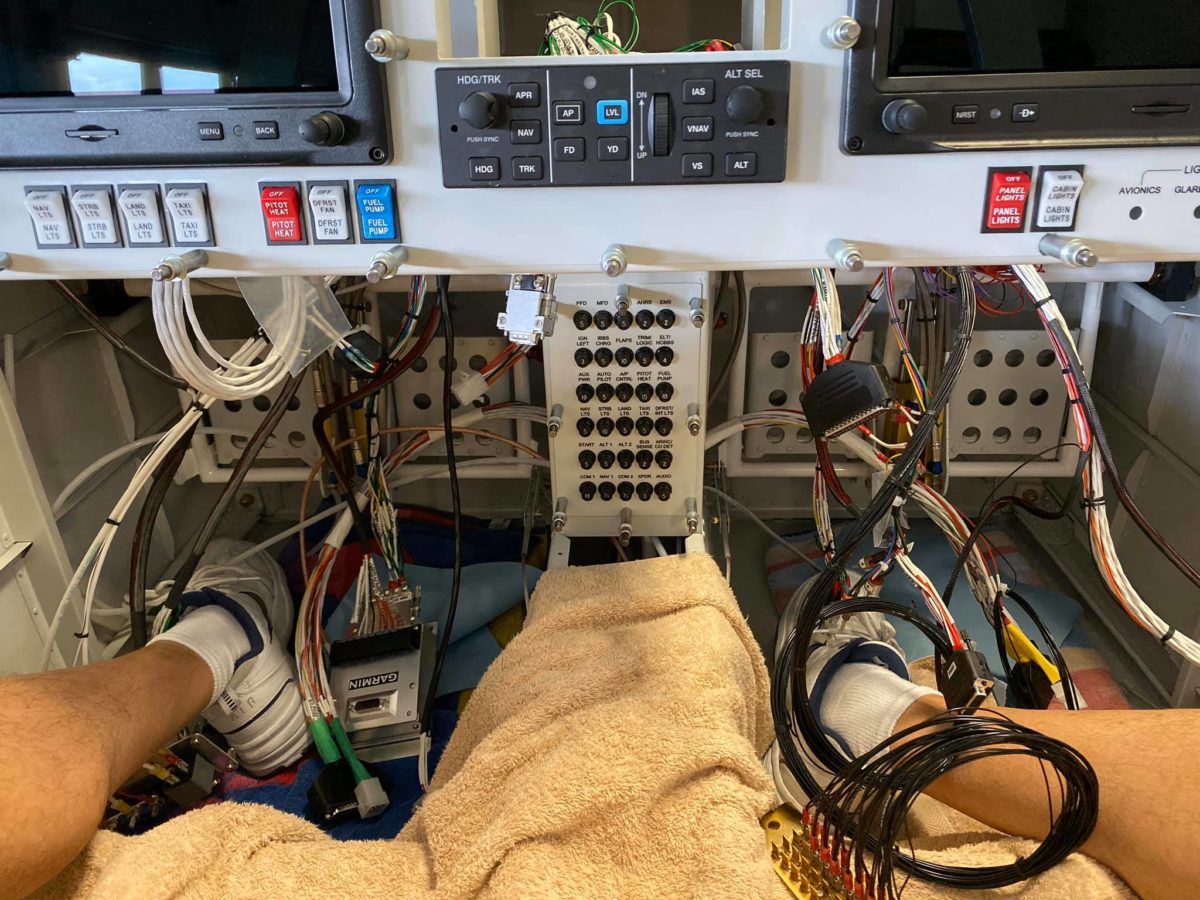
My accustomed position these days.

Contemplating the empty space in my panel and working myself up to begin fitting the GTN750 tray.

The connectors for the remote audio panel. It sits on top of the GTN750 tray and this is the only position from which they may be installed. A little from one side, then a little from the other side, and repeat until all four posts have been tightened.

Following installation of the GTN750 tray and mounting of the backplate, this is the view from inside.

Ta-da! The business side of the panel is nearly complete; it’s only missing the lighting pot knobs.

I’ll get all of the control cables installed once the other little boxes have been mounted on the sub-panel and the many dangling wires have been tidied.

Firewall forward component installation continued…

Threading one of the four baffle tension rods.

Two done, two to go.

All four ready for installation.

The left side rear nut was challenging to tighten, but a combination of socket, universal joint, and extension sufficed to get it done.

It’s amazing how much the curved, lower portions of the baffles tightened up against the cylinders when the rods achieved tension. Simple, but effective. Very cool.

Ah, the snorkel, at long last. I remember how much of a bear this job was on my last RV. Of course, I had an Airflow Performance fuel injection servo on that plane, which required some modifications and re-glassing to the lower end of the snorkel.

On this airplane, I’m using the stock FI system, but still anticipating some massaging of the snorkel before all is said and done. We shall see…

Initial snorkel fitting. Not great, but not as awful as it could have been. Onward!

Initial snorkel fitting. Not great, but not as awful as it could have been. Onward!

Firewall forward, finish, cowling progress

Left side Camloc flanges clecoed in place for fit.

Drill line drawn ΒΌ” down from cowling edge.

Right side Camloc flanges clecoed in place for fit.

Left side rivet hole locations marked.

Right side rivet holes drilled.

Left side flanges drilling to cowling in progress.

Right side flanges drilling to cowling in progress.

Left side flanges fully drilled to cowling.

Right side flanges fully drilled to cowling.

Right side rivet holes countersunk.

Right side flanges deburred and clecoed for riveting.

Right side flanges riveted.

Left side rivet holes countersunk.

Left side flanges deburred and clecoed for riveting.

Left side flanges riveted.

Firewall forward, finish, cowling in process

The lower cowling in the midst of the seemingly endless process of fitting, sanding, marking, fitting, sanding, etc. As much as I’m dreading the panel installation, I can’t wait to be done with the wretched fiberglass work and onto the wiring.

I can’t believe I just wrote that, but it’s true…

The lower cowling being fit-check for the 10,000th time this afternoon. Maybe more, but you’d have to ask my wife.

This was actually the last check and it fits decently on both sides when the bottom is being properly held up against the Camloc flanges…